- +1 858 909 0079
- +1 858 909 0057
- [email protected]
- +1 858 909 0079
- [email protected]
Products
Store at 4°C upon arrival for up to 6 months.
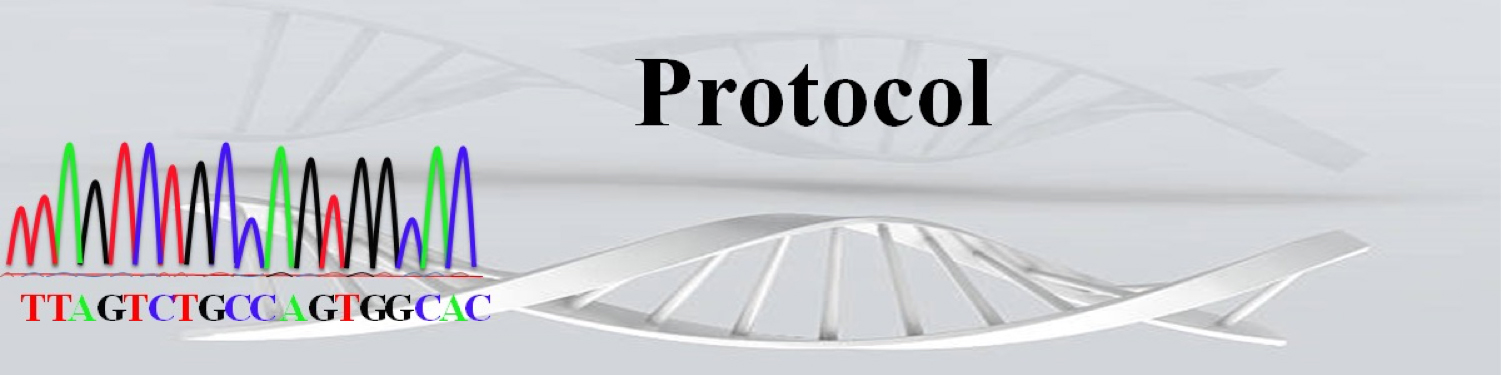
DNA sequencing is a powerful technique that has revolutionized the field of genetics. Among the different methods available, Sanger sequencing stands out as a key approach for its reliability and versatility. In essence, Sanger sequencing relies on the selective incorporation of fluorescent-labeled dideoxy nucleotide chain terminators during in vitro DNA replication, which produces fragments of varying lengths, each of which ends with a labeled dideoxynucleoside.
Unlike standard PCR, Sanger sequencing introduces a low ratio of modified nucleotides, known as ddNTPs, alongside normal dNTPs. The key advantage of this approach is that it allows for the accurate determination of the DNA sequence by producing fragments of different lengths that can be resolved by electrophoresis. This technique has found widespread use in a variety of applications, including de novo sequencing, mutation discovery and confirmation, and resequencing.
Despite its popularity, Sanger sequencing is not without limitations. One of the main challenges is the cost and time associated with the method, which has led to the development of more efficient and high-throughput sequencing technologies in recent years. Nonetheless, Sanger sequencing remains a cornerstone of molecular biology research and continues to be used in a variety of contexts, from basic science to clinical diagnostics.
BcMag™ One-Step Sequencing Cleanup Kit is specifically designed for fast and efficient purification of the post-Sanger Sequencing reaction. The entire protocol takes only one tube and is complete in less than 5minutes (Fig 1). The magnetic beads are added directly to the finished sequencing reactions and vortexed to capture the impurities (e.g., unincorporated dyes, dNTPs, residual salts, and other interfering components). After vortexing, the beads are magnetically captured, while the clean supernatant can be directly loaded onto a capillary sequencer.

●
One tube, 3 min protocol, No sample loss
●
Reliable results: excellent Long and short fragment recovery, Q20 read length > 800 bases.
●
Cost-Effective: Tremendously reduced labor costs and other consumed material such as columns, filters, laborious repeat pipetting, and ethanol.
●
High throughput: Compatible with many different automated liquid handling systems.
●
Compatible with BigDye Xterminator run modules, e.g., unnecessary to remove the magnetic beads from the tube, the supernatant can be directly loaded onto the capillary sequencer.
●
Efficient removal of any dye terminator
●
Store at 4°C upon arrival for up to 6 months.
! IMPORTANT !
The following protocol is optimized for the efficient purification of sequencing reactions containing 2 µl (1:4 dilution of the terminator) or less of BigDye Terminator v3.1 and v1.1 or other dye terminators in a total reaction volume of 10 µl. If an alternative reaction scale or dye terminator is used, the procedure may need to be optimized.
There are two methods of purifying the DNA sequencing reaction products.
1.
Using 96-well PCR plates/tubes.
2.
Using 96-Well Microplates.
Materials Required by the User
Item
18.2 MΩ.cm, DNase/RNase-Free Ultrapure Water
Item
BcMag™ 96-well Plate Magnetic Rack (side-pull) compatible with 96-well PCR plate and 96-well microplate or other compatible Racks
Source
Bioclone, Cat. No. MS-06
Item
Adjustable Single and Multichannel pipettes
Item
Centrifuge with swinging bucket
Addition items are required if using 96-well PCR plates / tubes
Vortex Mixer
** The user can also use other compatible vortex mixers. However, the Time and speed should be optimized, and the mixer should be: Orbit ≥1.5 mm-4 mm, Speed ≥ 2000 rpm
Eppendorf™ MixMate™
Eppendorf, Cat. No. 5353000529
Tube Holder PCR 96
Eppendorf, Cat. No. 022674005
Smart Mixer, Multi Shaker
BenchTop Lab Systems, Cat. No. 5353000529
0.2 ml 96-well PCR Plates
Applied Biosystems, Cat. No. 4306737
Olympus 0.2 ml 96-Well PCR Plate, Non-Skirted
Genesee Scientific, Cat. No. 24-300
0.2 mL Olympus 8-Strip PCR Tubes
Genesee Scientific, Cat. No. 24-706
0.2mL Axygen™ 8-Strip PCR Tubes
Fisher, Cat. No. 14-222-252
Addition Items Are Required If Using 96-Well Micro-plates
Vortex Mixer
** The user can also use other compatible vortex mixers. However, the time and Speed should be optimized, and the mixer should be Orbit ≥3 mm-4 mm, Speed≥ 800 rpm
Fisher Scientific™ Microplate Advanced Vortex Mixers
Fisher, Cat. No. 02-216-101
OHAUS Microplate Vortex Mixers
OHAUS, Cat. No. 30392160
Thermo Scientific™ 96-Well Microtiter™ Microplates
Fisher, Cat. No. 14-245-142, or 14-245-71
Greiner Bio-One 96-Well Non-Binding Microplates
Fisher, Cat. No. 07-000-090
Eppendorf™ MTP 96 Microplates
Eppendorf Cat. No. 951040048
Items
18.2 MΩ.cm, DNase/RNase-Free Ultrapure Water
Source
BcMag™ 96-well Plate Magnetic Rack (side-pull) compatible with 96-well PCR plate and 96-well microplate or other compatible Racks
Bioclone, Cat. No. MS-06
Adjustable Single and Multichannel pipettes
Centrifuge with swinging bucket
Addition items are required if using 96-well PCR plates/tubes
Vortex Mixer
** The user can also use other compatible vortex mixers. However, the Time and Speed should be optimized, and the mixer should be: Orbit ≥1.5 mm-4 mm, Speed ≥ 2000 rpm
Eppendorf™ MixMate™
Tube Holder PCR 96
Smart Mixer, Multi Shaker
Eppendorf, Cat. No. 5353000529
Eppendorf, Cat. No. 022674005
BenchTop Lab Systems, Cat. No. 5353000529
Eppendorf™ MixMate™
Tube Holder PCR 96
Eppendorf, Cat. No. 5353000529
Eppendorf, Cat. No. 022674005
Smart Mixer, Multi Shaker
BenchTop Lab Systems, Cat. No. 5353000529
PCR plates/tubes
! IMPORTANT ! If using other tubes or PCR plates, make sure that the well diameter at the bottom of the conical section of PCR Tubes or PCR plates must be ≥2.5mm.
0.2 ml 96-well PCR Plates
Applied Biosystems, Cat. No. 4306737
Olympus 0.2 ml 96-Well PCR Plate, Non-Skirted
Genesee Scientific, Cat. No. 24-300
0.2 mL Olympus 8-Strip PCR Tubes
0.2mL Axygen™ 8-Strip PCR Tubes
Genesee Scientific, Cat. No. 24-706
Fisher, Cat. No. 14-222-252
0.2 ml 96-well PCR Plates
Olympus 0.2 ml 96-Well PCR Plate, Non-Skirted
0.2 mL Olympus 8-Strip PCR Tubes
0.2mL Axygen™ 8-Strip PCR Tubes
Applied Biosystems, Cat. No. 4306737
Genesee Scientific, Cat. No. 24-300
Genesee Scientific, Cat. No. 24-706
Fisher, Cat. No. 14-222-252
Addition items are required if using 96-well microplates
Vortex Mixer
** The user can also use other compatible vortex mixers. However, the time and Speed should be optimized, and the mixer should be Orbit ≥3 mm-4 mm, Speed≥ 800 rpm
Fisher Scientific™ Microplate Advanced Vortex Mixers
OHAUS Microplate Vortex Mixers
Fisher, Cat. No. 02-216-101
OHAUS, Cat. No. 30392160
Fisher Scientific™ Microplate Advanced Vortex Mixers
Fisher, Cat. No. 02-216-101
OHAUS Microplate Vortex Mixers
OHAUS, Cat. No. 30392160
Thermo Scientific™ 96-Well Microtiter™ Microplates
Fisher, Cat. No. 14-245-142, or 14-245-71
Greiner Bio-One 96-Well Non-Binding Microplates
Fisher, Cat. No. 07-000-090
Eppendorf™ MTP 96 Microplates
Eppendorf Cat. No. 951040048
Thermo Scientific™ 96-Well Microtiter™ Microplates
Greiner Bio-One 96-Well Non-Binding Microplates
Eppendorf™ MTP 96 Microplates
Fisher, Cat. No. 14-245-142, or 14-245-71
Fisher, Cat. No. 07-000-090
Eppendorf Cat. No. 951040048
Procedure
A. Prepare the Premix Beads solution.
! IMPORTANT !
●
The magnetic beads and water can be added as a premix or sequentially.
●
Do not allow the magnetic beads to sit for more than 2 minutes before dispensing.
●
Before pipetting, shake or vortex the bottle to completely resuspend the Sequencing Magnetic Beads.
1.
Prepare a fresh Master Mix following Table1 for the number of samples to be processed, plus 10% more (e.g., if you have 10 samples, prepare Master Mix for 11). Add the following components to the reservoir.
2.
Add the following components to each well/or reagent reservoir based on Table 1.
3.
Add 52 μL premix the beads solution to each well of PCR plate or PCR tube (using 96-well PCR plates/tubes method) or each well of the microplate (using 96-Well Microplates).
! IMPORTANT !
●
Pipet up and down premix beads solution in a reagent reservoir until the solution is homogeneous before dispensing.
●
Do not allow the magnetic beads to sit for more than 5 minutes before dispensing.
Table 1
Components
One Well (10‑μL Reaction Volume)
Sequencing Clean Beads
7 μL
Ultrapure Water
Total
45 μL
52 μL
B. Sample Processing
1.
After cycle sequencing is complete, remove the seal or cap and add 75 μL Ultrapure Water to each well/tube and mix well to make a sequencing solution.
2.
Aspirate 10 μL sequencing solution to each well of plate or PCR tube in premix beads solution in step A3. (** if necessary, centrifuge at 2500 rpm for 30 seconds to bring all contents to the bottom)
3.
Vortex according to Table 2 or Table 3
Table 2
96-well PCR plates/PCR tubes
Vortex Mixer
Eppendorf™ MixMate™
Mix-3000 Smart Mixer
Speed
2000 rpm
2000 rpm
Time
10 minutes
5 minutes
Table 3
96-Well Microplates
Vortex Mixer
Speed
Time
Fisher Scientific™ Microplate Advanced Vortex Mixers
800 rpm
3 minutes
OHAUS Microplate Vortex Mixers
800 rpm
3 minutes
! IMPORTANT !
The user can use other compatible vortex mixers. However, the mixing condition should be optimized, such as time and Speed, and the mixer should be Orbit ≥3 mm-4 mm, Speed ≥ 800 rpm
4.
After vortexing, place the sample plate or PCR tube on the magnetic separation plate for 30 seconds or until the solution is clear.
5.
Centrifuge at 2500 rpm for 30 seconds to remove bubbles.
6.
Place the sample plate or PCR tube on the magnetic separation plate for 30 seconds or until the solution is clear.
C. Prepare the reaction plate for the capillary sequencing instruments.
! IMPORTANT !
Do not heat or use formamide with the sample.
Method
Action
96-well PCR Plates / PCR Tubes
Direct injection
The original Bigdye X-terminator Purification Kit run modules are available at www.thermofisher.com/ sangerpatches.
Indirect injection
96-Well Micro-plates
Indirect injection
D. Troubleshooting
Problem
Dye Blobs (Dye artifacts)
Probable Cause
Too much Dye
Suggestion
The protocol is optimized for 2 µl or less of ABI BigDye Terminator v3.1. If possible, use 2 µl or less.
Or increase the amount of the magnetic beads.
Problem
Dye Blobs (Dye artifacts)
Probable Cause
Insufficient DNA template in the reaction
Suggestion
Increase DNA template concentration.
Problem
Dye Blobs (Dye artifacts)
Probable Cause
Incomplete removal of Dye
Suggestion
Problem
Dye Blobs (Dye artifacts)
Probable Cause
The magnetic beads are not properly suspended during dispensing
Suggestion
Thoroughly resuspend the magnetic beads before using them.
Problem
Weak Signal
Probable Cause
Improper reaction conditions
Suggestion
Ensure a control sequencing reaction is performed during each thermocycling procedure and optimize reaction conditions if necessary.
Problem
Weak Signal
Probable Cause
Injection time too short
Suggestion
Increase injection time to 35-40 seconds.
Problem
Weak Signal
Probable Cause
Extension product concentration is too low.
Suggestion
Increase DNA template concentration.
Problem
Probable Cause
Suggestion
Dye Blobs (Dye artifacts)
Too much Dye
The protocol is optimized for 2 µl or less of ABI BigDye Terminator v3.1. If possible, use 2 µl or less.
or increase the amount of the magnetic beads.
Insufficient DNA template in the reaction
Increase DNA template concentration.
Incomplete removal of Dye
The magnetic beads are not properly suspended during dispensing
Thoroughly resuspend the magnetic beads before using them.
Weak Signal
Improper reaction conditions
Ensure a control sequencing reaction is performed during each thermocycling procedure and optimize reaction conditions if necessary.
Injection time too short
Increase injection time to 35-40 seconds.
Extension product concentration is too low.
Increase DNA template concentration.
Get the Latest News and Updates by Email
6393 Nancy Ridge Dr. Suite A
San Diego, CA 92121 USA
Fax: +1-858-909-0057
Get the Latest News and Updates by Email
© 2023 Bioclone Inc. All Rights Reserved.
Magnetic Beads Make Things Simple